2. HOW TO GET SOURCE FILE AND IMAGE
User can get SP7021 source code, develop board source bin file and image from SUNPLUS Yocto server. PLUS1 Yocto. (http://113.196.136.132/)
2.1 How to get source bin file and image
Please connect to SUNPLUS Yocto server to get SP7021 source bin file and package.
The procedure as below:
2.1.1 Register
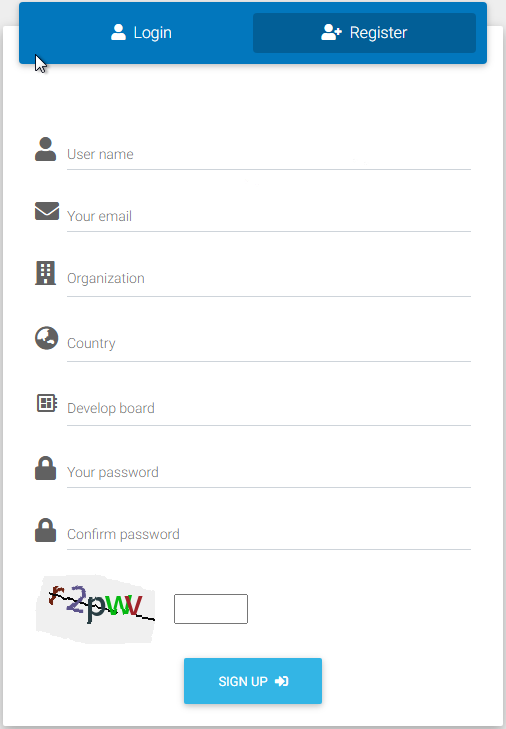
The upper right corner of Figure 1 have prompt word of register, click it to come in register page. Please fill the basic information to register your identity. Click "SIGN UP" icon to finish register, if register success, there have a small window to show register successful message. After leave register page, system will come to login page again, please fill username and password that registered to login.
Figure 1. register page
2.1.2 Login
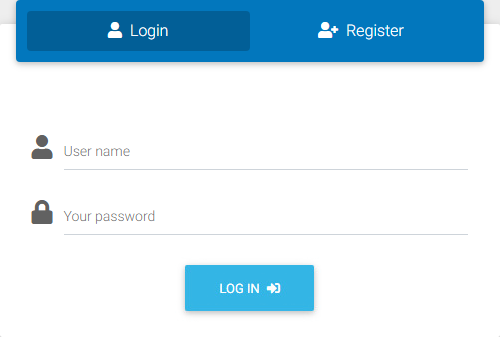
Second step is login. If user is login at the first time, you should register some information at first(refer to 2.1.1 register). If user already have account and password, please directly fill them and login.
Figure 2. login page
2.1.3 Get source bin file
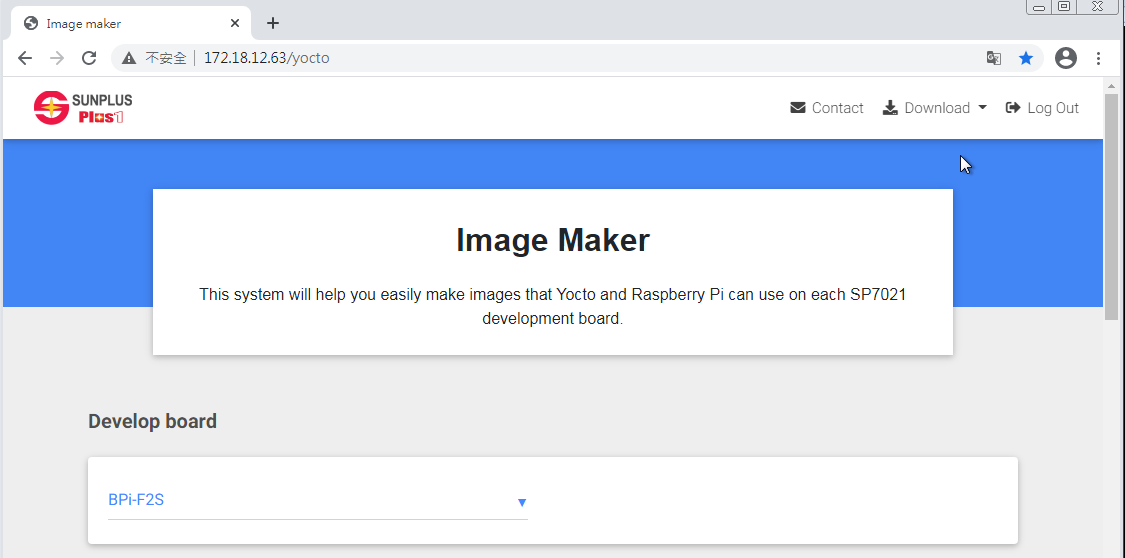
After login success, system will come in to Yocto Image Maker page as Figure 3. User can get executable image of development board in this page. This page can also help user to get Yocto and Linux source code of SP7021 (Later section will describe this more detail).
Figure 3. Yocto Image Maker
Regarding to get image file, there are three steps.
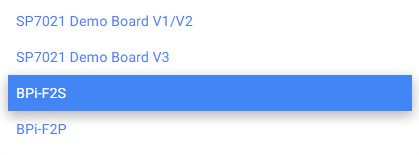
Firstly, please select "Develop board".
Secondly, please select "Rootfs".
Thirdly, please select "Boot from".
Please select correct items that correspond to your develop board.
For example, if you have BPi-F2S board and want to boot from eMMC with pure linux system, please select "Develop board" as BPi-F2S, "Rootfs" as Yocto(zeus) and "Boot from" as eMMC. After selected items, please click "Run" icon to generate the image file.
Currently Linux system support version is 5.4LTS.
When the Rootfs item select "Yocto", there are many supported packages can be select. User can select packages that you want to generate Linux image file.
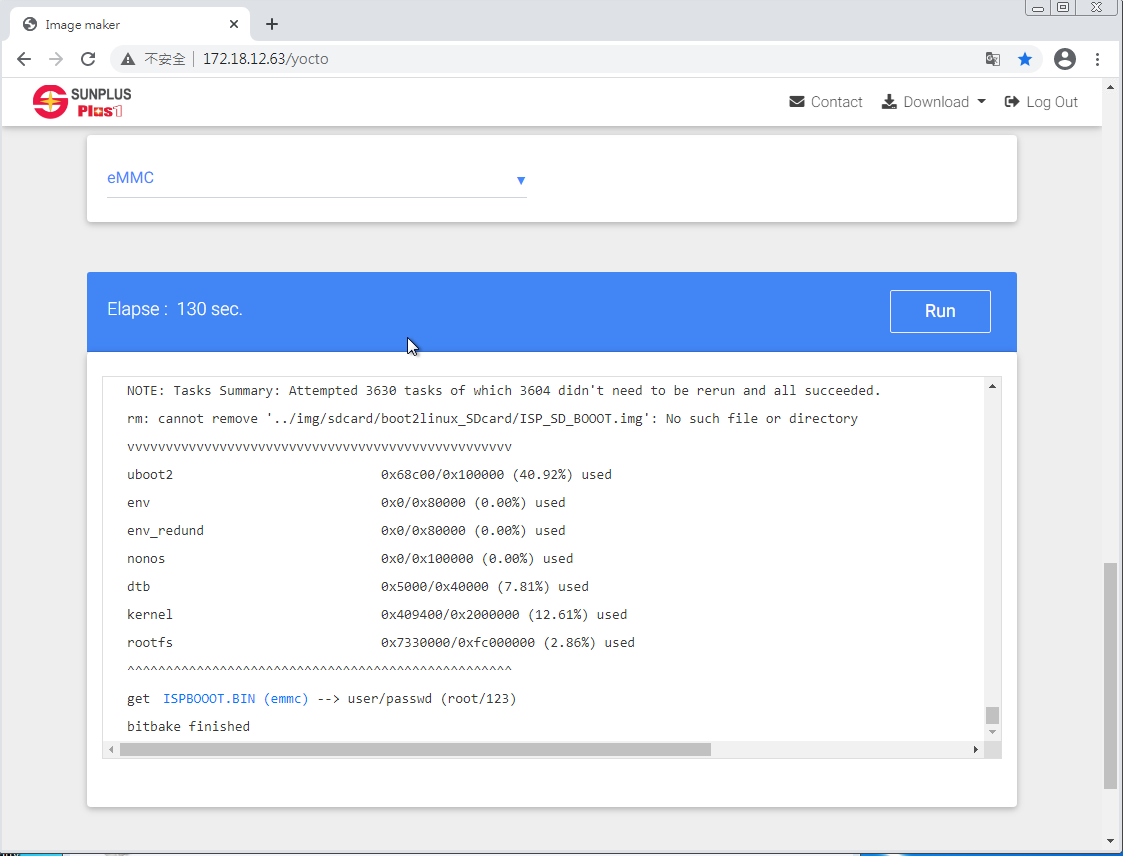
Figure 4 shows the picture of Yocto Image Maker page after run finished. You can see the ISPBOOOT.BIN(emmc) word with blue color in the main window. Click ISPBOOOT.BIN word to download the bin file.
Figure 4. Get ISPBOOOT.BIN(emmc) after run finished
2.1.4 Get compatible Raspbian-OS image
If the Rootfs item select "Raspberry Pi(2020-08-20-raspios-buster-armhf)", the system will generate the Raspbian-OS image for curresponding develop board. After selected items, please click "Run" icon to generate the image file.
When you select Rootfs as "Raspberry Pi(2020-08-20-raspios-buster-armhf)", the "Boot from" item will fixed to SDCard. Please burn the image file to SDCard for bootup.
Use Win32DiskImager, BalenaEther or other SD card writers to write the unzip Raspbian image to an SD card. Note that size of SD card should be greater than 8 GB. Refer to step 4 of How to build SP7021 Linux image for booting from SD card for how to write image file to an SD card.
Figure 5 shows the picture of Yocto Image Maker page after run finished. You can see the 2020-08-20-raspios-buster-armhf.img.bz2 word with blue color in the main window. Click 2020-08-20-raspios-buster-armhf.img.bz2 word to download the bin file.
Figure 5. Get 2020-08-20-raspios-buster-armhf.img.bz2 after run finished
2.2 How to get Yocto source file
If user is familiar the Yocto, you can capture the Yocto source code to edit and compile by yourself.
Please connect to Sunplus Yocto server to get SP7021 Yocto source file. PLUS1 Yocto. (http://113.196.136.132/)
The procedure as below:
- Connect to Yocto server and the login page will be found. If user is login at the first time, you should register some information at first. If user already have account and password, please directly fill them and login.
- After login, user will come in the Yocto system main page as the Figure 6. Please select the "Download -> Yocto zeus source" words in the blue icon area to download Yocto source code. The downloaded file is "plus1.yocto.tar.gz". Decompress it to get " pony" folder.
Figure 6. Yocto compile system main page with yocto source selection
- Before start compile, please install below packages in your linux system. You can directly set command as below:
sudo apt-get install gawk wget git-core diffstat unzip texinfo gcc-multilib build-essential chrpath socat cpio python python3 python3-pip python3-pexpect xz-utils debianutils iputils-ping libsdl1.2-dev xterm realpath
PS. Some new version linux( > ubuntu18.04.2) will report problem with git-code/xz-utils/readpath packages, please try below command:
sudo apt-get install gawk wget git diffstat unzip texinfo gcc-multilib build-essential chrpath socat cpio python python3 python3-pip xz-utils debianutils iputils-ping libsdl1.2-dev xterm coreutils python3-pexpect
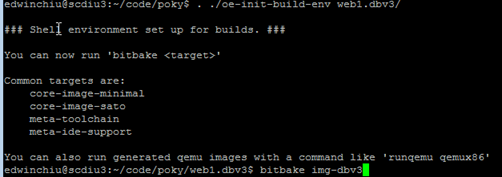
- Come in to "poky" folder and execute ". ./oe-init-build-env web1.dbv3/" to set environment variable. Please refer to Figure 7.
- Come in to "poky/web1.dbv3" folder and execute "bitbake img-dbv3" to produce binary files. Please refer to Figure 7.
Figure 7. bitbake binary files
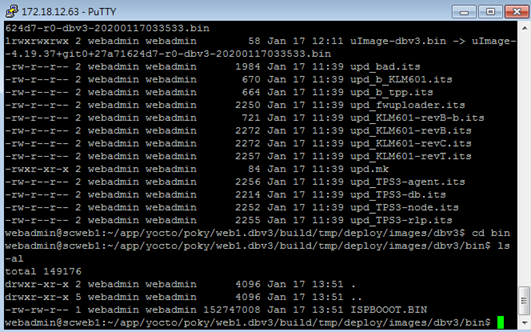
- Come in to "poky/web1.dbv3/build/tmp/deploy/images/dbv3/" and execute "make -f sp_make.mk" to produce ISPBOOOT.BIN file. The bin file will be save at "poky/web1.dbv3/build/tmp/deploy/images/dbv3/bin/". Please refer to Figure 8.
Figure 8. Produced ISPBOOOT.BIN
2.3 How to get linux source file
If user is familiar the Linux, you can capture the Linux source code to edit and compile by yourself.
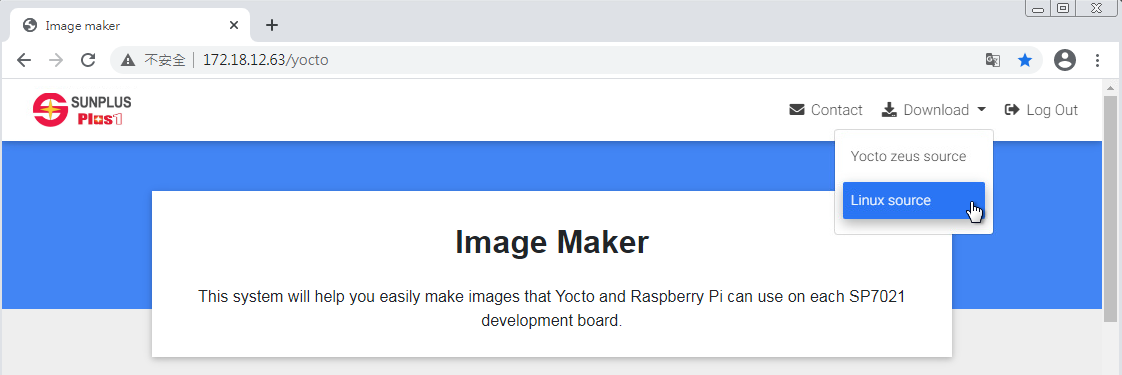
Please connect to Sunplus Yocto server to get SP7021 linux source file. PLUS1 Yocto. (http://113.196.136.132/)(Refer to Figure 9)
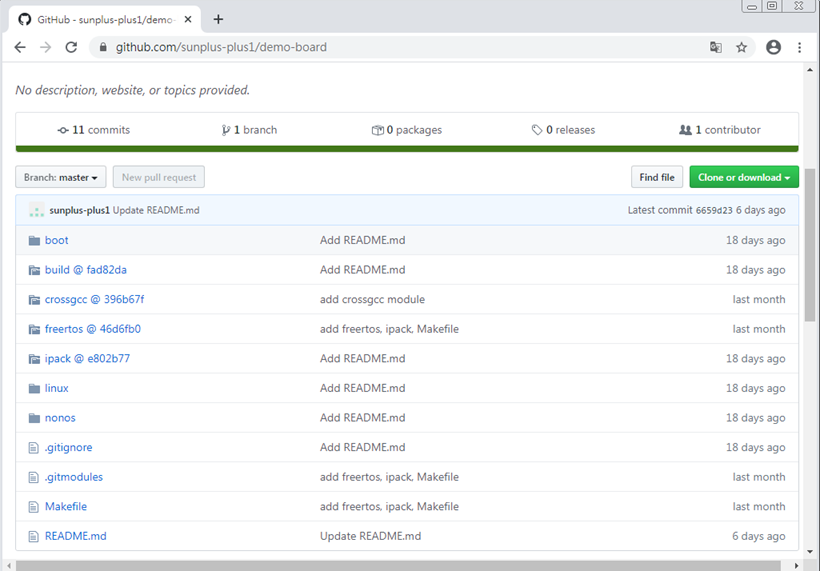
Please select the "Download -> Linux source" words in the blue icon area to come in Github page. (Refer to Figure 10)
Figure 9. Yocto Image Maker page with linux source selection
Figure 10. Github page with linux source code
In the command line window, follow below commands procedure to get source code.
git clone https://github.com/sunplus-plus1/SP7021.git
cd SP7021_4.19
git submodule update --init --recursive
git submodule update --remote --merge
git submodule foreach --recursive git checkout master
2.3.1 Compiling Procedure
The operation procedure, please refer to https://github.com/sunplus-plus1/SP7021.git
2.4 In system programming (ISP) from USB to EMMC storage
Please follow the below procedure.
- Copy ISPBOOOT.BIN to USB stick
- Plug in USB stick and pull SP7021 pin118(IV_MX[5]) to "L" and pin113(IV_MX[6]) to "H"
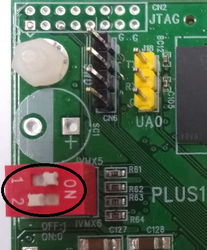
If user has SP7021 DEMOBOARD, please set SW1 to "0" and SW2 to "1". Please refer to the black circle area in Figure 11.
Figure 11. DEMOBOARD switch.
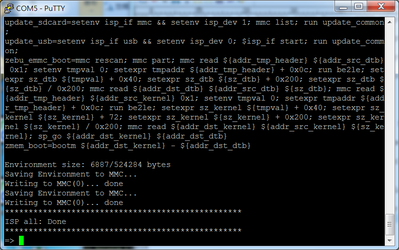
- After power on, the platform will program the EMMC automatically. Figure 12 shows the message when the code is completely updated to EMMC.
Figure 12. EMMC code update end
- After ISP progress is done, pull SP7021 pin118(IV_MX[5]) to "H" and pin113(IV_MX[6]) to "H", then power on again for boot-up.
If user has SP7021 DEMOBOARD, please put SW1&SW2 both to "1", then power on again for boot-up.
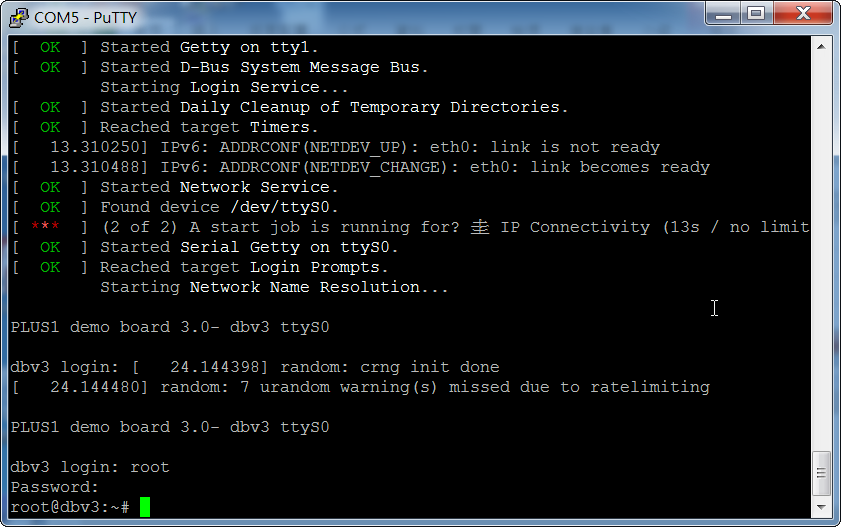
Figure 13 shows the message when the code boot up ok. Please type "root" to login system and password is "123".
Figure 13. Boot up finished.
2.5 Example of Linux system with Python package support
If user want to execute Python program in the SP7021, you should select python package in the Yocto system and generate a bin file that supported python.
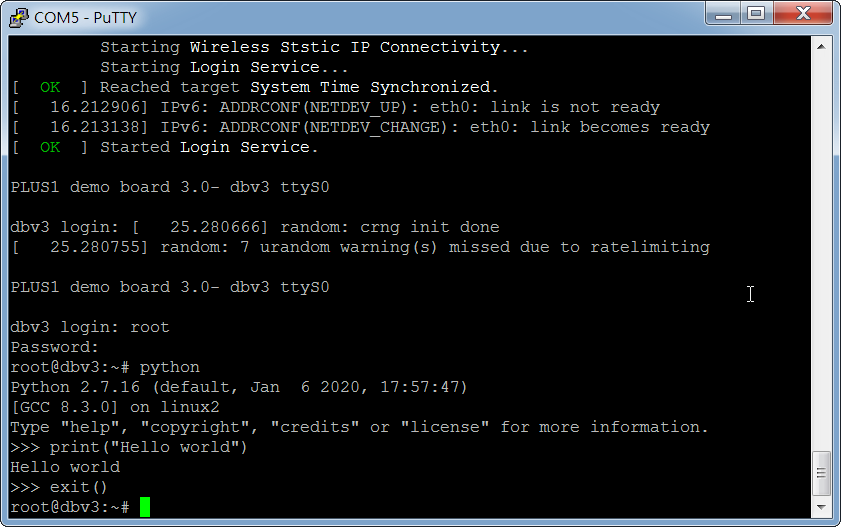
After login to linux system, user can start edit and run python program. Below procedure show a simple example of how to print "Hello world".
Step1: Type "python" // come in python function
Step2: Type "print("Hello world") //You will see "Hello world" in the next line.
Step3: Type exit() //leave python function
Figure 14 shows the command line message when operate above steps.
Figure 14. Example of execute python program
